Detail Page
The detail page of an object gives an overview of all the data stored in the object and the relations it has to other objects. This is one of the core ways to manipulate your data in Datastorms.
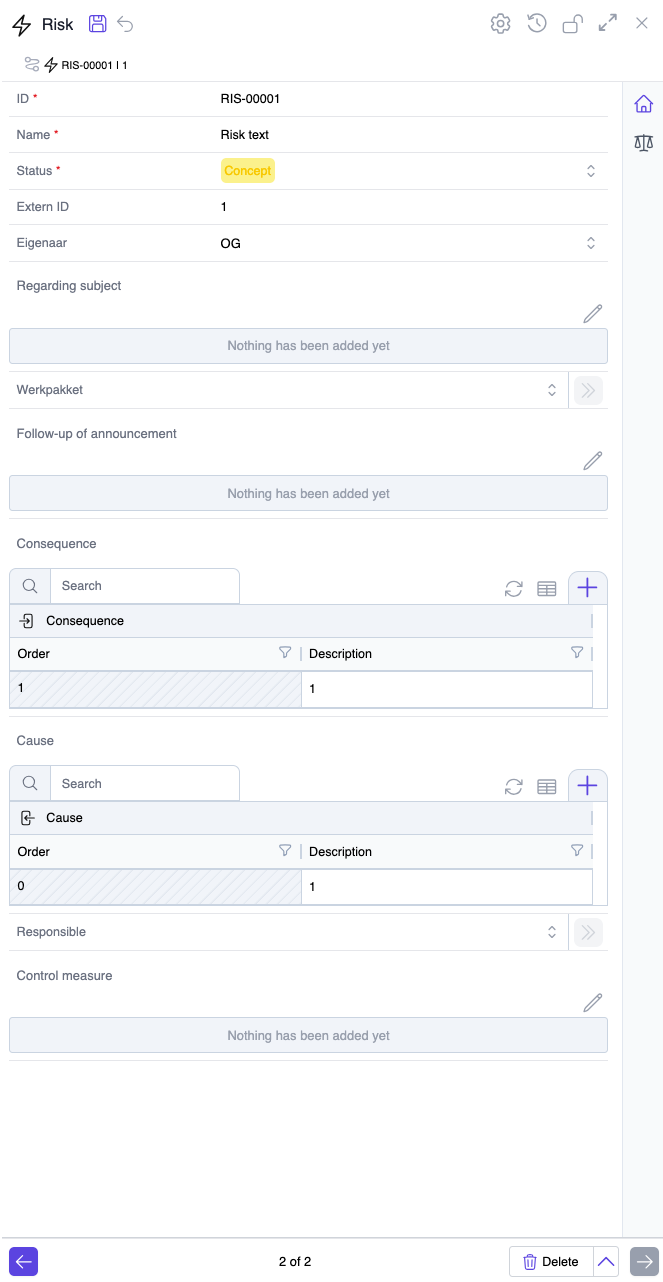
If you do not have permission for a certain action, the button or field for that action will not appear. If some buttons or fields are unavailable to you, this is the reason.
Top Bar

1. Schema Information
This region shows the schema information corresponding to the object you have opened. The schema icon and name are visible here.
2. Save Indicator
This icon shows the current save state of the object. If the icon is purple, the object is saved. You can also click this icon to manually save the object.
3. Undo/Redo
These icons appear if changes have been made to the object after opening the detail page. The changes can be undone or redone using the corresponding buttons.
4. Schema Settings
Takes you to the schema settings.
This button is only visible to users with administrator rights.
5. Object History
Here you can access the history of the object you are viewing. You can see which property values or relation selections have been changed, when they were changed, and by whom.
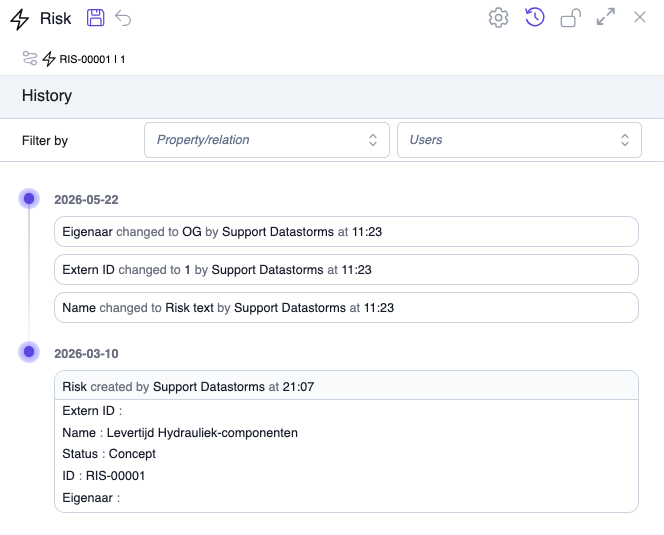
The ability to see the history of an Object is a special permission.
6. Lock Object
Locks the object, disallowing further changes by anyone until it is unlocked. It also means the object is no longer selectable in relations for other objects.
The ability to (un)lock an Object is a special permission.
7. Fullscreen
Sets your detail page to fullscreen mode.
8. Close
Closes the detail page.
Tabs
Here you see the different tabs set by your system administrator. Each tab displays a different set of properties or relations. Simply click on a tab icon to navigate between them.
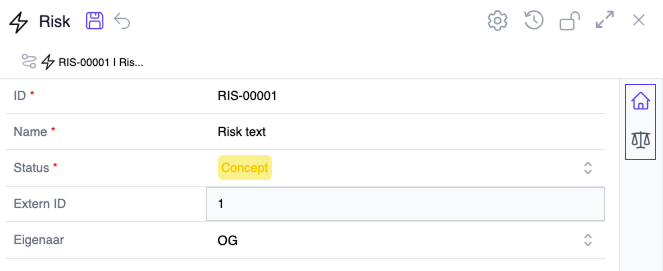
Breadcrumbs
When navigating from object to object through relations, Datastorms shows you the path you took to reach your current location. These are called breadcrumbs.
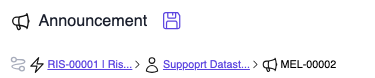
Each breadcrumb is clickable and will take you back to that point in your navigation path.
Fields
Most of the space on the detail page is occupied by data in the form of properties or relations that correspond to the object you are viewing. Here you can manipulate your data.
Properties
There are many types of properties an object can have. Below are some examples of text properties.
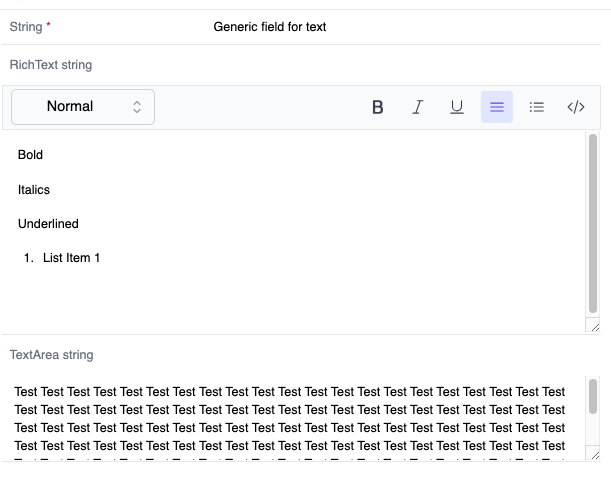
If a property or relation is required, it will have a red asterisk next to it. This means it must be filled out before the object can be saved.
Relations
Relations appear on detail pages as either tables or dropdowns, depending on the settings by your systems administrator.
Table Relations
When displayed as a table, as shown below, the buttons above these tables have the same functionality as those above regular tables (Table buttons).
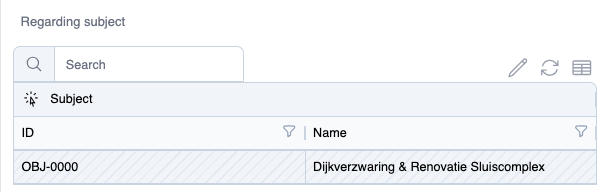
Editing table relations.
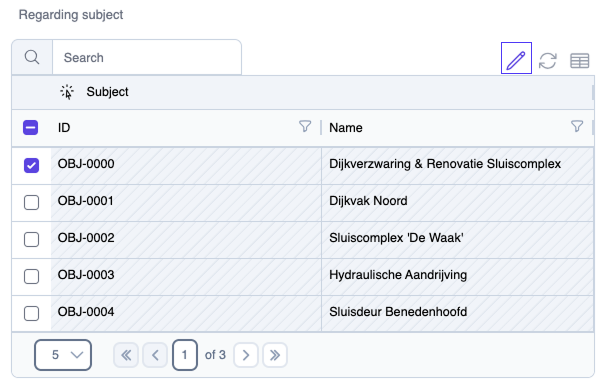
To edit a table relation, click the pencil icon above the table. This switches the relation to edit mode, where you can view and select available candidates. When edit mode is active, a plus icon appears, allowing you to create and attach a new object if the desired one is not available in the list.
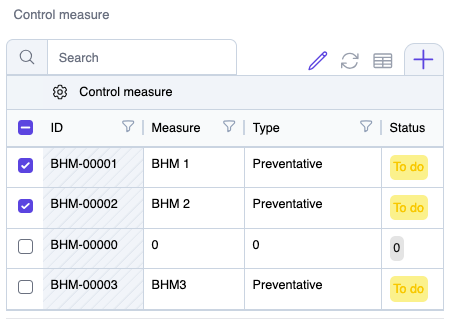
There is a special type of relation called Bind to Parent. For this relation, there is no pencil icon — only the plus button to create a new object.
Dropdown Relations
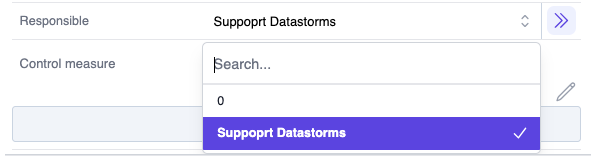
When a relation is displayed as a dropdown, you can select an item directly from the menu. Next to the dropdown at the left side, you will find a double arrow icon. Clicking this button directly opens the detail page of the selected item.
Action Button
The action button at the bottom of the object detail page allows you to create a new object of the same schema, duplicate the current object, or delete the current object.

Duplication will copy the object wherever possible. If a relation selection cannot be duplicated due to its cardinality, it will be left unselected in the new object. Autogenerated properties like IDs will be automatically incremented.
Navigation Buttons
The navigation buttons at the bottom of the detail page allow you to navigate between the objects in the table you opened your object from.
