Schema
Add a new Schema
- Go to Project Settings → Schema
- Click the green plus icon
This creates a new schema, titled"New Schema x"
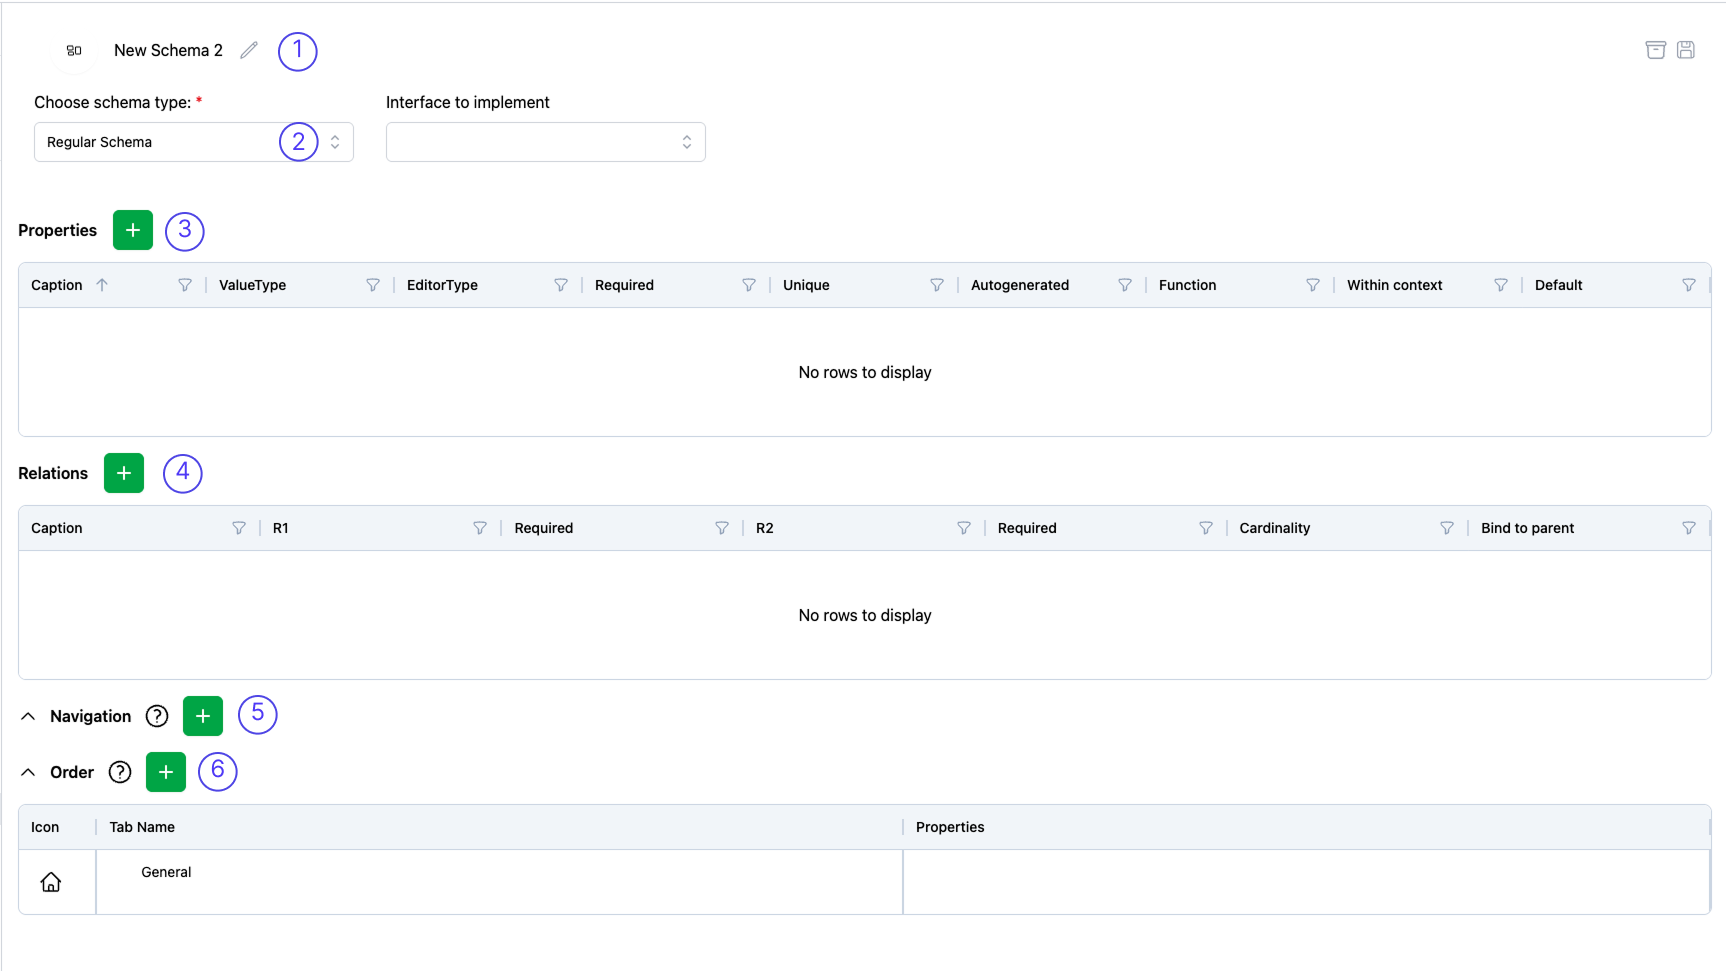
① Name your Schema
Give your schema a clear and descriptive name, such as Person, Document, or Company.
② Choose Schema type
Use "Regular schema" if unsure what to do. More information on the other types can be found here:
③ Choose Icon
You can select an icon for your schema's. You can find here how to set an icon.
④ Add Properties
Use the interface to define properties for your schema. Each property describes a specific detail (e.g. Name, Date of Birth, Location, etc.).
⑤ Add Relations
Define how this schema connects to others in your data model:
Example: A
Personschema can have a relation works at →Company.
These relations allow structured and meaningful links between schema instances.
⑥ Identifier
A value can be set here to identify the specific instance. This value is used within the page trajectory on detail pages and for relation dropdownlist option.
A page trajectory is the sequence of detail pages a user navigates through, helping them keep track of their journey from start to finish.
To make this work effectively, enuse the complete value of the Identifier becomes unique. If two instances have the same name, it becomes difficult to distinguish between them in the trajectory or when chosing to select one.
Since an ID is always unique, including it in the name (e.g., [ID] - [Name]) automatically ensures the identifier is unique.
The more recognizable your identifiers are, the easier the system is to use. However, you must find the right balance. Choose a format that is recognizable enough for quick navigation, but robust enough to remain unique across your entire dataset.
Example: Name @ Date will result in for example REQ0001@12-03-2026
⑦ Organize layout and tabs
In this section the object detail page lay-out for this specific schema is defined. Every detail page has at least one tab named "General". However, more tabs can be added. The primary goal of using Tabs is to improve UI clarity. Instead of loading and displaying all properties and relations at once, tabs allow you to group related information logically, keeping the interface clean and manageable.
Managing Tabs
- Create Tabs: Click the plus button (➕) to add a new tab.
- Icons: You can assign unique icons to each tab. This makes it easier to recognize sections at a glance.
- Navigation in ODP: In the Object Detail Page (ODP), these tabs are located on the right-hand side, as highlighted by the red box in the image below.
- Reordering: You can easily change the order of your tabs by dragging the 6-dot handle (⠿) next to the tab name.
-d5a6defdd3293c131dbd75511161ff82.png)
Organizing Properties & Relations
- Reorder Items: Simply drag and drop properties or relations into your preferred order.
- General Group: Click “General” to manage layout groups within your tabs.
- Multi-tab visibility: A property or relation can be placed on multiple tabs simultaneously if needed.
- Minimum requirement: Every property or relation must be assigned to at least one tab.
- Deletion Safety: If you delete a tab that contains a property not placed anywhere else, that property will automatically be moved to the "General" tab. This ensures no data fields are accidentally hidden or lost.
For usabiliy reasons, place all required properties and relation on top of the general tab. It is required to have a value for these properties and relations before the object will be saved. When placing these properties and relations on a different place, it makes it hard for the end user to understand why his data is not saved!
⑧ Save the Schema
Once everything is configured click Save to store the schema. Once saved, your schema becomes part of the project’s data model and can be used to create structured, interrelated records.
Archive or delete a Schema
Archiving a schema is useful when it is no longer actively used but should be preserved for reference or future use.
How to archive a Schema
- Go to the Schema tab in your Project Settings
- Hover over the schema you wish to archive
- Click the yellow box icon
The schema is now archived. It will no longer appear in the default list of active schemas.
How to restore or permanently delete a Schema
To manage archived schemas:
- Go to the Archived Schemas list
- Locate the schema you want to act on
From here, you have two options:
-
Restore the schema
Click the yellow Unarchive button to make the schema active again. -
Permanently delete the schema
Click the red Delete button to remove it completely from the system.
Deleting a schema is irreversible. Make sure it is no longer in use before removing it.