Project
Projects are the core of Datastorms. However the name states Project, it is also possible to use it as library or catalog.
All actions below are only available for users with organisation standard role "Owner" or "Project admin".
Create a New Project
There are three ways of adding a new project:
- Creating a new project from scratch.
- Uploading an existing one which is downloaded before from the same or another environment.
- Creating a new one based on a template.
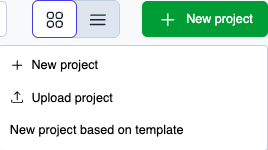
Option 1: Creating a new project (from scratch)
When create a new project it does not contain any content. Use this option if you want to create a project which you want to develop from scratch.
Enter Project settings
When you have clicked the button to make a new project, the following popup window will appear:
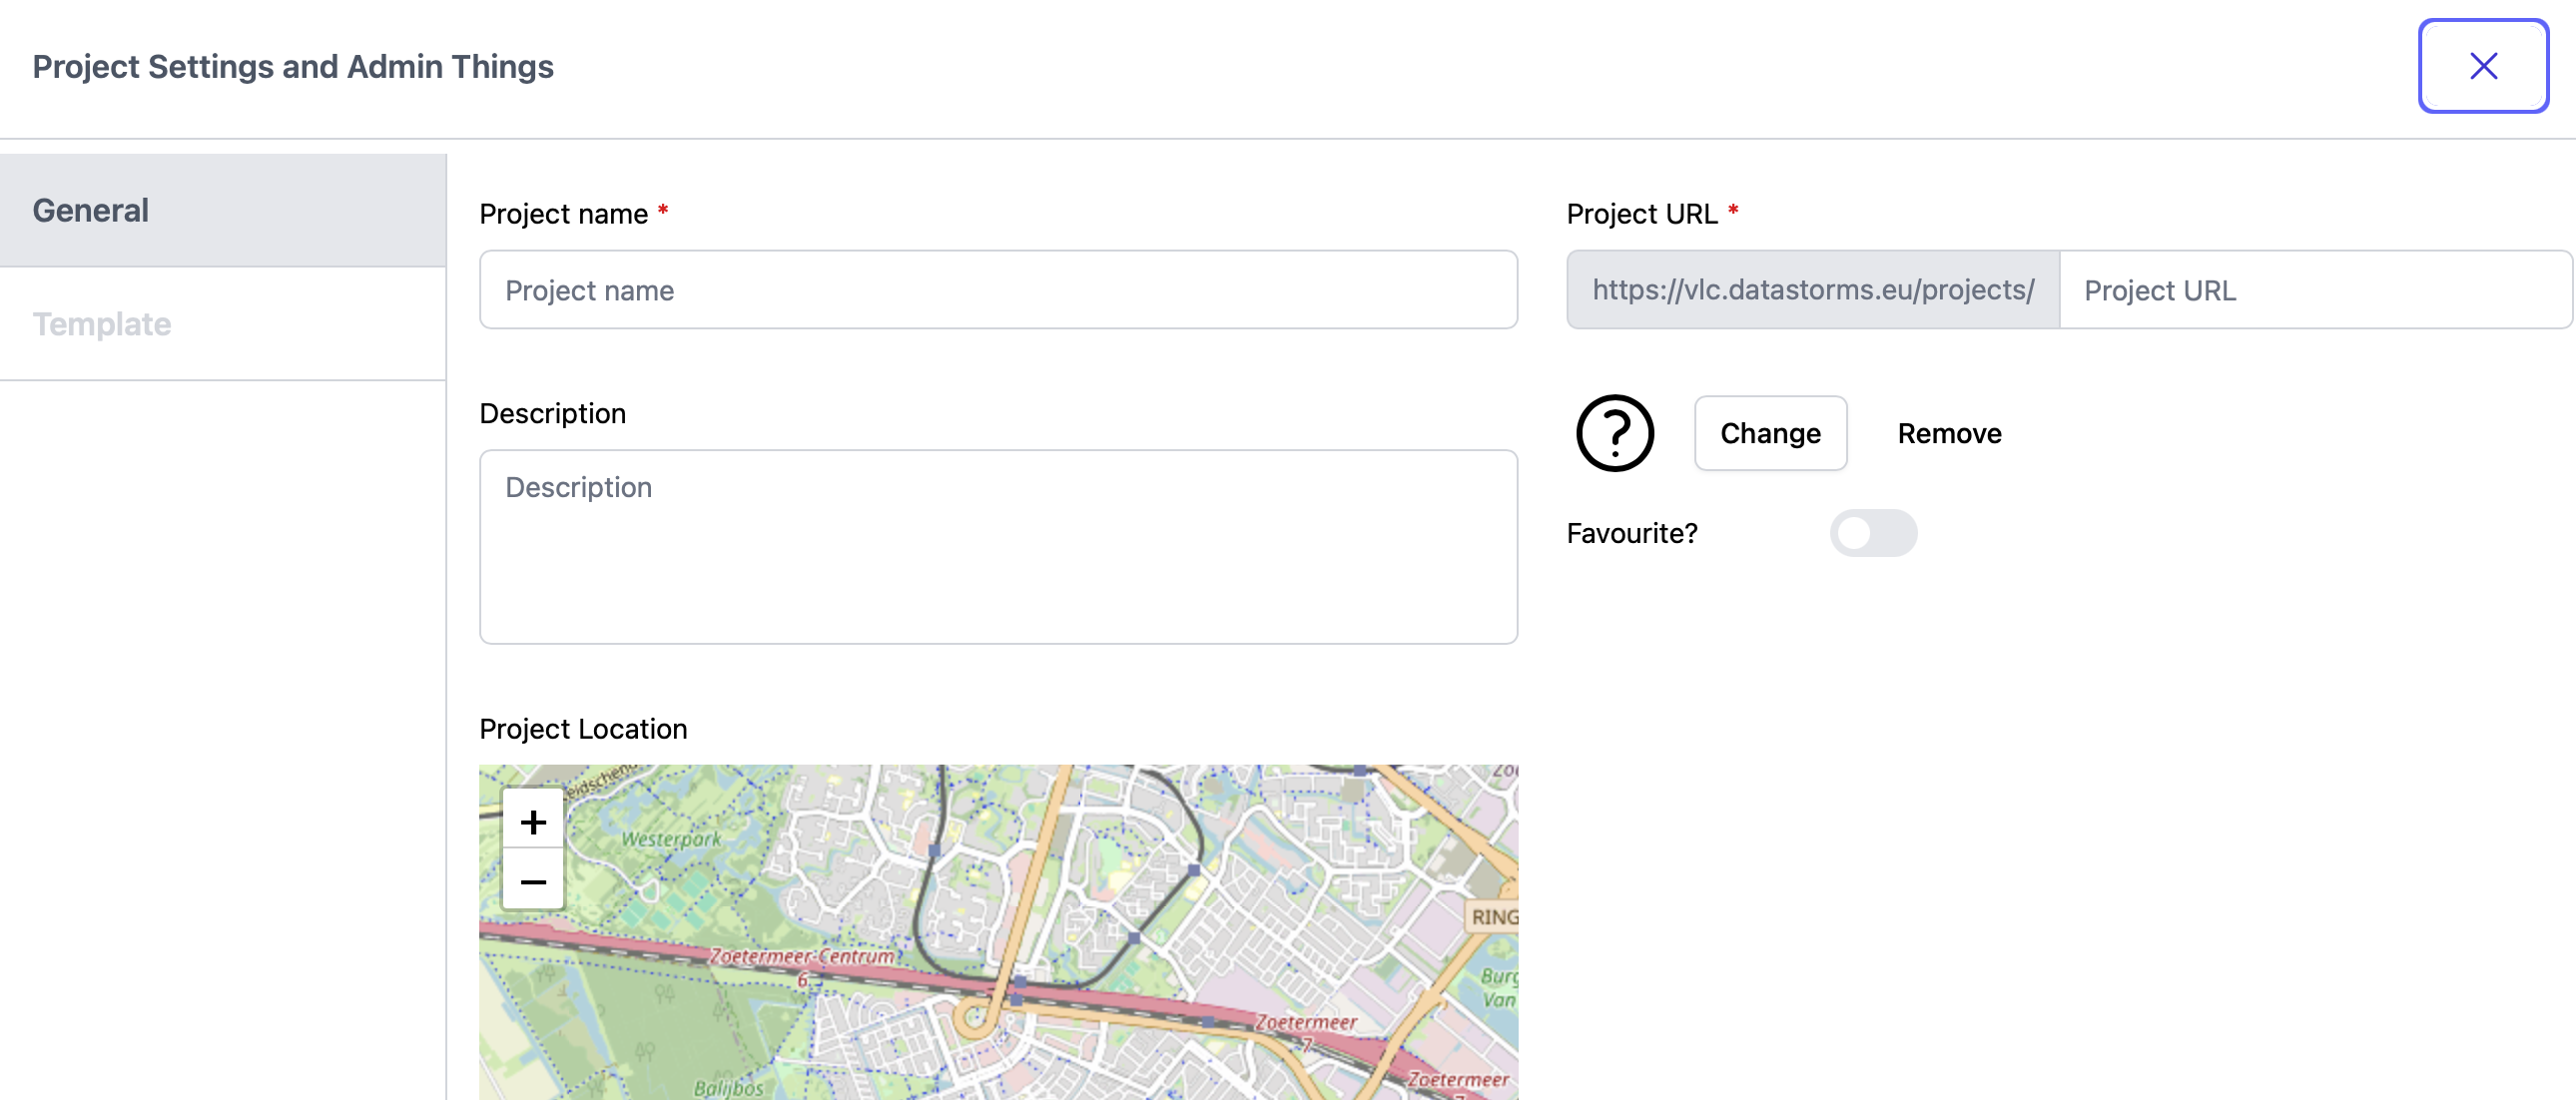
Here you can set all sorts of project specific settings, of which there are two required: the Project name and the Project URL. Once the project name has been filled in, the URL will be automatically according to the project name.
- Only use letters and numbers (no special characters or spaces)! Datastorms does not accept other characters in the URL.
- The URL must be unique across the platform, else it is impossible to save the settings.
Add Optional Details
You can now add additional information to your project to ensure that the project has been found more easily and has more descriptive information:
Description
This can be useful to provide a short summary of the project’s purpose. Adding a description is as simple as typing the desired text in the text field. This text will then be visible under the project title.
Logo
This is useful to find a specific project that the user is looking for when they see the project list. To change the icon of the project, the following has to be done:
- Under the project URL you will see either an image if the project already has an icon or a question mark. Click on the button with change to upload an image.
- Save the project setting by clicking on save.
When using an image as the icon for a project, it is recommended that an image with a 1:1 aspect ratio is chosen. If a different aspect ratio is chosen, the image will be cut off or cropped.
Save and Create
Once all required fields are filled in, click Create. The project will now be available and appear in your project list.
Option 2: Uploading an existing project
If you already have a downloaded project that you want to upload in either the same or a different environment, you can upload this project. Once you choose the option, a popup window will open with your computer's file explorer. Click the project file that you want to upload, and the uploaded project will be found in the environment.
Option 3: Create a new project based on template
When choosing this option the template tab will open. Choose the template you want to base the new project on. A confirmation will be asked before the template is used. After this the project settings dialog wil open for entering the project settings.
You are only able to create a project based on a template if you are allowed to use the template. There are two reasons to have access:
- You are owner of the template.
- The template toggle Others can create or connect a project with this template is set to true.
Archiving / deleting a project
Depending on the Organisation settings a project is archived or deleted. An archived project will no longer be visible for end users but is still recoverable in the case that the project might be needed again. To archive a project, click the three dots in the top right of the project and then click Archive.
When a project has been archived, it will be deleted automatically after 7 days or when someone deletes it manually. If a project is to be deleted, navigate to the Archived tab. Then click the three dots at the right end of the entry in the list, and click delete.
A deleted project is no longer recoverable, so keep this in mind in whether a project is deleted or not!