Imports
Importing data to Datastorms so it can be used in relational schemes is a very useful feature, enabling larger quentities of data into a project quickly. To run an import, first an import definition needs to be made.
- Option 1: Using names from Excel sheet in Datastorms
- Option 2: Using names from Datastorms in the Excel sheet
A. Making an import definition
- Navigate to project settings and click Import

- Click Import and click the plus icon to create a new import definition

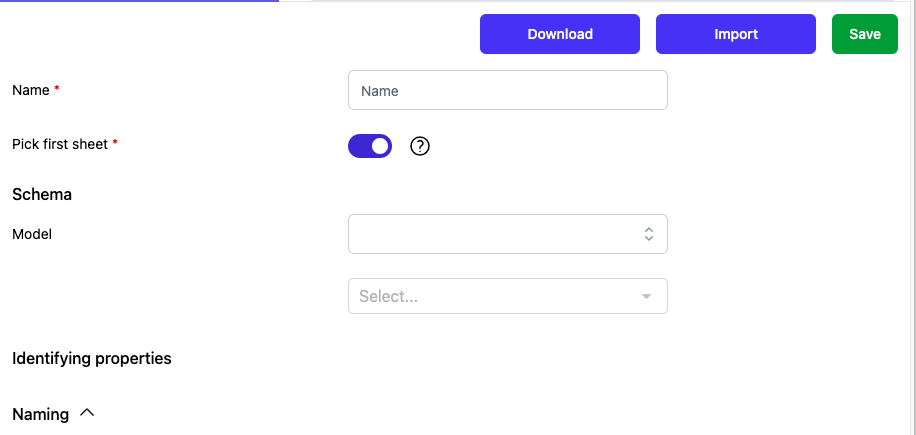
- The name can be edited in the Name field.
-
Select the appropriate schema to be used for the import process.

-
Select the properties to be imported. Ensure at least one is designated as a unique identifier (for instance an ID).
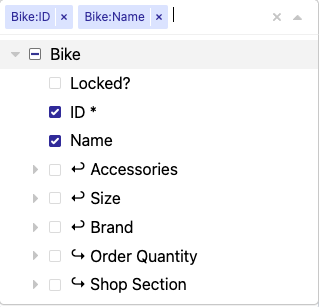
Select the identifying property from the list of available options.

There are two methods for linking an Excel sheet to the import definition:
Option 1: Using the Excel column names as property labels
- Verify the Excel document and map each column header to its corresponding property in the schema. For example, enter 'Bike ID' and 'Bike Name' as they appear in your spreadsheet.
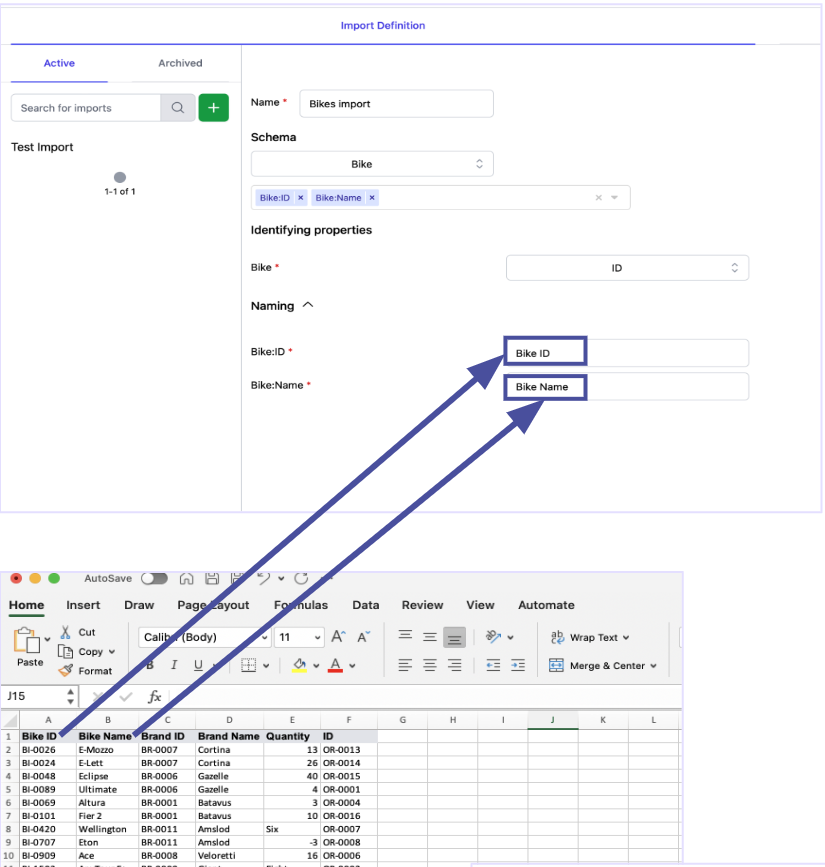
- Save the import definition by clicking on Save.

Option 2: Using the names from Datastorms in the Excel sheet
-
Write down some naming for both properties, like ‘Bike ID’ and ‘Bike Name’;
-
Save the import definition.
-
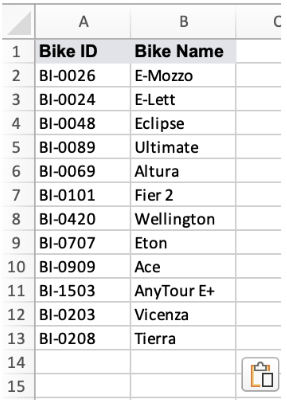
The Download button is now active. Click it to generate an Excel template containing column headers that match your import definition.

- Fill the empty columns in the template with your source data. The following image illustrates a correctly formatted import sheet.
- Save your file locally so it is ready for the final upload step.
B. Import definitions for different relation types
There are multiple types of relations that can be imported, which are the folllowing:
- R1 properties: This process imports property data for a single schema.
- Linking R1 and R2: This process imports both data elements and their connecting relationship in a single step.
- RS schema
- Interface schema
R1 properties
- This is our most streamlined import process. Simply follow the steps in Section A to ensure a seamless setup.
Linking R1 and R2
This process builds upon the R1 properties import. The key difference is that R2 also shares a relationship with R1, requiring both sides to be defined.
- Complete Steps 1 through 3 in Section A.
- At Step 4, identify the schema that links to R2 and select R2 properties.
- Map the properties for both schemas involved in the relationship to ensure a successful import.
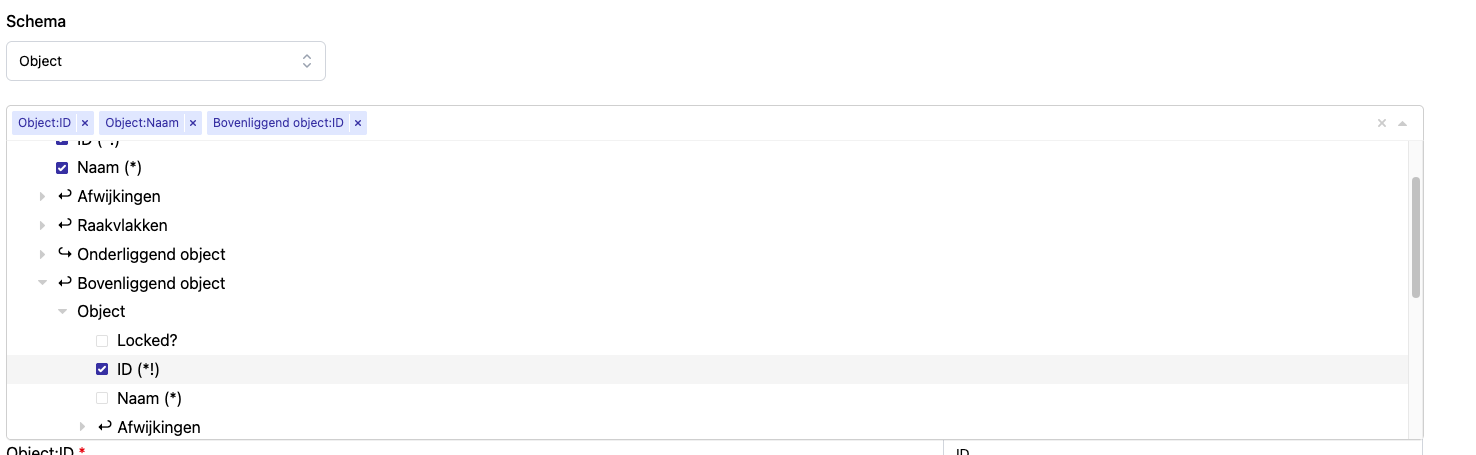
Relational Schema (RS)
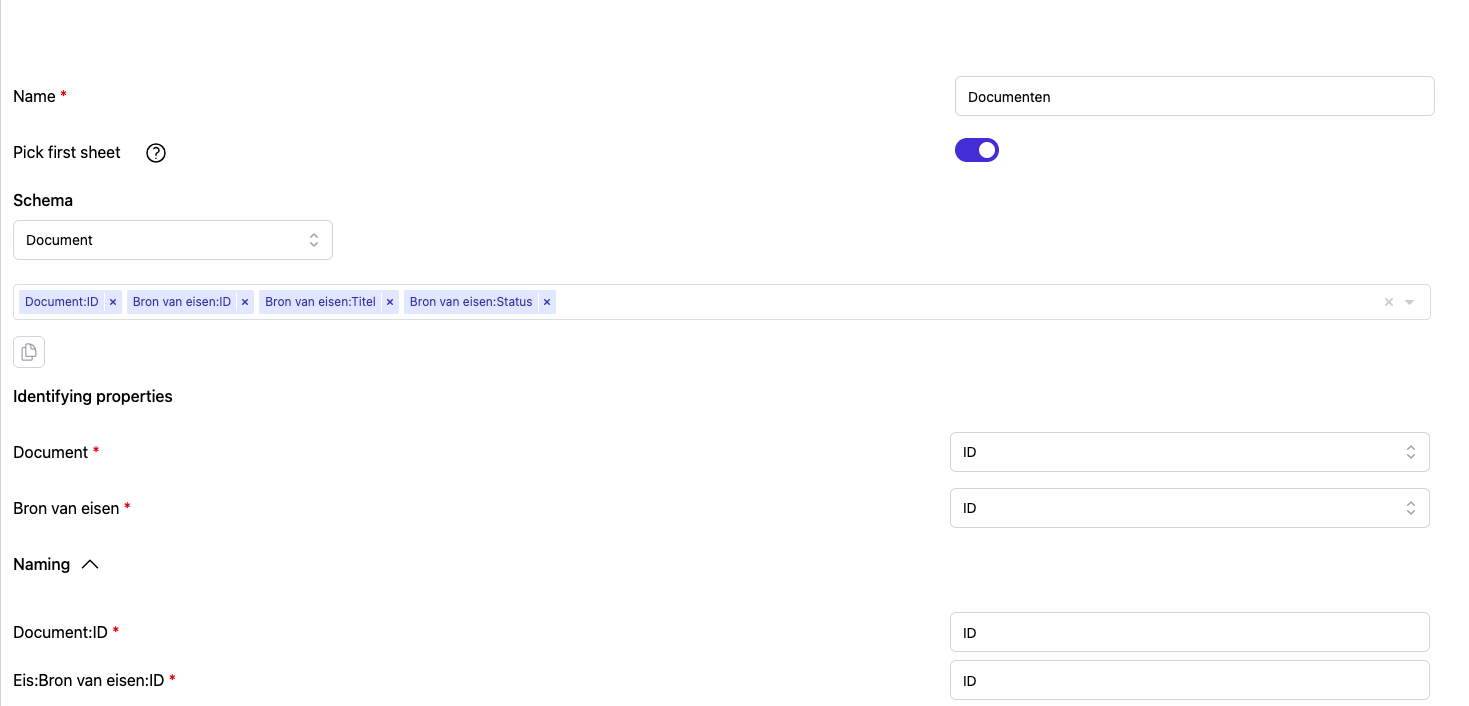
If your RS schema doesn't have its own specific properties, you can follow the same steps used for a standard R1-R2 link. In this case, the configuration will appear as follows:
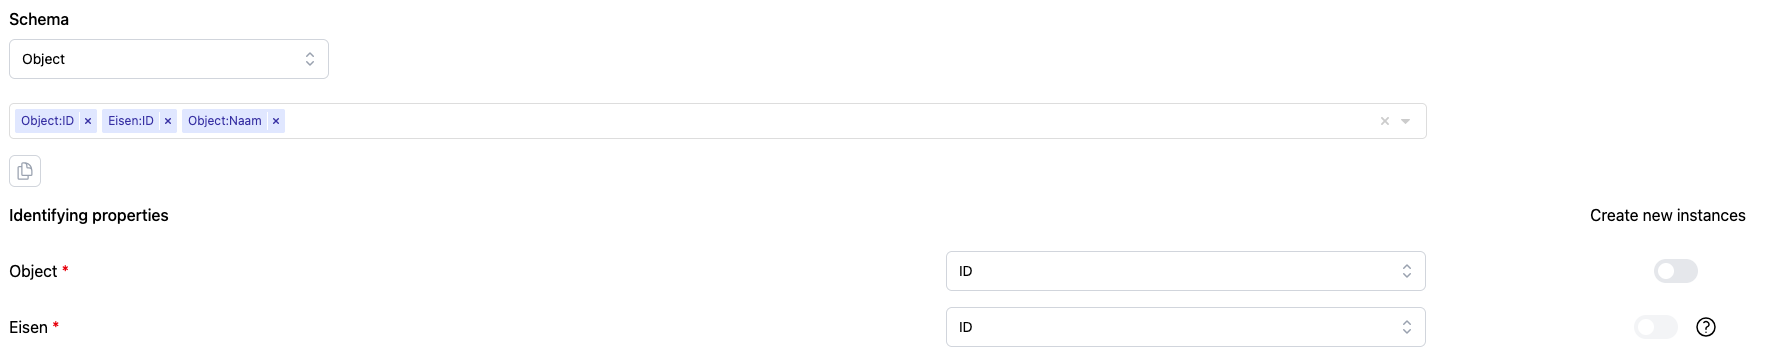
In most cases, your RS schema will contain its own metadata (such as dates, quantities, or statuses). When these properties exist, the RS must be explicitly defined in your import configuration. While the steps below focus on mapping the unique properties (like IDs), you can follow the same logic to include any additional RS properties required for your dataset.
- Follow the steps in section A until step 3.
- In step 4 select the R1 schema.
- Now the other properties of the R2 schema and the RS schema should be selected. Make sure to include unique properties (usually an ID) for all three parts: R1, R2 and the RS.
If your source data lacks a unique identifier for the RS relation, you can create one manually. Use Excel’s Concatenate function (or the & operator) to merge the R1 ID and the R2 ID into a new column. This combined value will serve as a unique identifier for the relationship during the import.
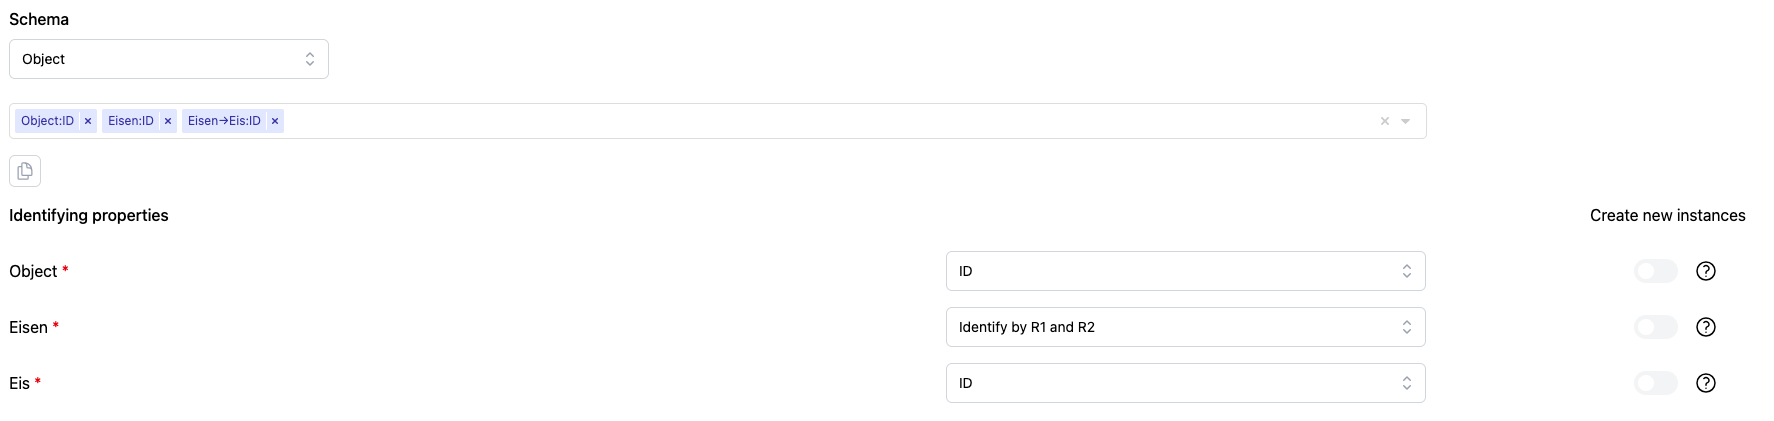
In the image below, you can see an example using Object (R1), Requirement/Eis (R2), and Allocation/Allocatie (RS). Note that a unique identifier has been selected for each individual schema to ensure the system can bridge them correctly.
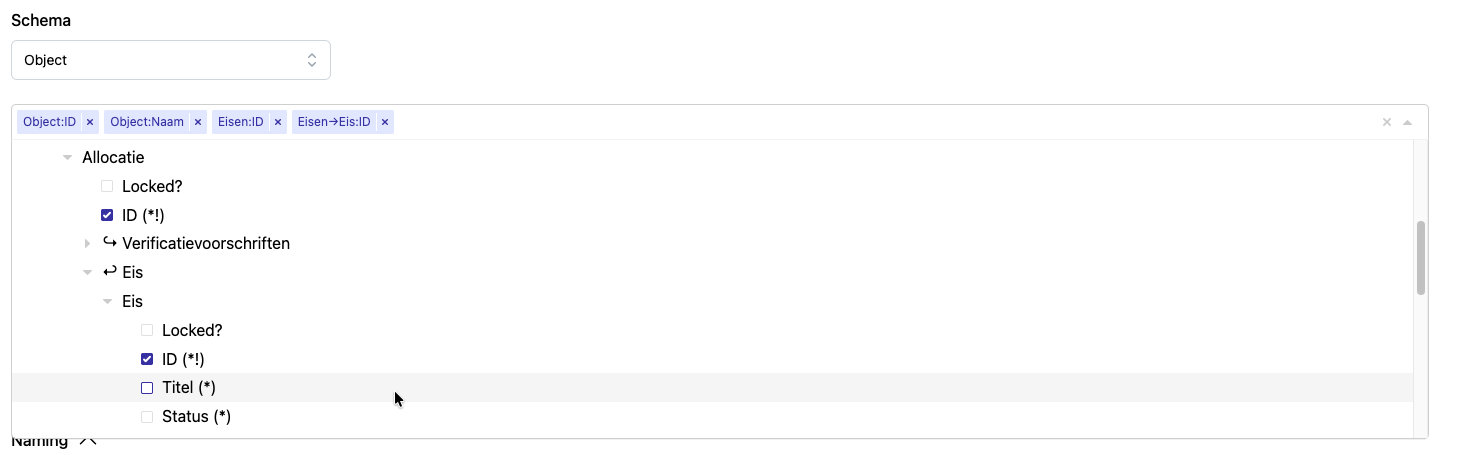
- Choose the correct names under the Naming tab, and click save.
The final set-up should look like this:
Interface schema
There are multiple situations related to importing an Interface schema. The situations are as follows:
- R1 --> Interface schema --> R2
- R1 --> Interface schema --> Relational schema --> R2
- Interface Schema --> Interface Schema
R1 to R2 including an interface schema
Interface schemas cannot be selected directly for imports and will not appear in the dropdown menu. Instead, follow the configuration steps below, using the provided example as a guide.

To import this interface we have to create two imports, one starting from R1 Document and one starting from R1 Contract Document.
- Follow the steps in section A until step 3.
- In step 4 a schema needs to be selected. Select one of the R1 schemas.
- For step 5, select the properties of the selected schema, and then select the property of the R2 schema that the Interface Schema is connected to. You do not have to select anything of the interface schema.
- Follow the rest of the steps in section A.
- Do the same for the other R1 schema.
In the software this example looks like this:
Interface Schema with RS
It is possible that there is an RS and an interface, like the below example:

Follow the same steps as a standard interface import, but ensure the RS is included as a unique identifier. You must select a unique identifier (like ID) for each component: R1, RS, and R2.
Interface Schema to Interface Schema
- It is not possible to import these types of relations.